At this point last year we had 3 feet of snow. Sweet memories!?! I hope that your winter has been heathy so far.
Think positive. Boating weather will return soon!!
I want to share with you what my staff and I have learned to improve your experience at OrthoWell and to remind you how awesome you CAN feel. Read on and let’s get you back on track.
How can “Cups” Heal your Injuries Faster?
This Unique Eastern Technique Has Been Used for 1000’s of Years
If I were to tell you that putting suction cups on your point of pain would help you recover from injuries faster, would you believe me? If you’re hesitant, I don’t blame you. I had been treating patients for over 2 decades and it wasn’t until I personally experienced the benefits of cupping therapy when I became convinced. I couldn’t believe that something so simple could work so well.
Cupping therapy may sound strange but it has been used in traditional Chinese medicine for thousands of years. We are finding that this supplemental therapy actually increased the effectiveness of other techniques that we use in our clinic.
If you haven’t experienced cupping therapy in our clinic then click the video below to see a demonstration.
Does your foot hurt?
Start feeling better TODAY!
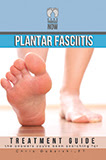
Our goal with the Plantar Fasciitis Treatment Guide is to help people who are struggling with foot pain and its yours – FOR FREE!
If you are interested in gaining the knowledge to heal yourself or have a friend that is in need of help, then our treatment guide is the right place to start. Foot pain can really wear you down. We want to help you return to living a normal, happy and PAIN-FREE life.
We have put together the ONLY comprehensive protocol for the treatment of plantar fasciitis. We want to show you how YOU can help yourself.
This option is for those of you who want the consistency of care on a monthly basis but do not want to spend all the money up front for a Preferred package. This program allows us to automatically debit your credit card on a monthly basis. It includes all of the features of the Preferred Program and is priced at $60 per session. You can schedule an ongoing appointment or call to schedule as needed. If you dont use it, you will NOT lose it. We will just keep track of what you have used or not used. However, the purpose of our maintenance is programs is to use them consistently in order to prevent any reccurence of pain. We would only need a 60 day advance notice to cancel the program.
SUCCESS STARTS HERE!
“After completing a round of physical therapy with Chris and Matt at Orthowell I am so pleased with the results. I came in barely able to run 3 miles without pain and within 2 weeks I saw a difference. I appreciate the education they provide as well. What I love most about their office is the access to multiple types of treatment. ART, Laser, Cupping and Massage all played a role in my recovery. The icing on the cake is the friendly service I received!” – Meg King
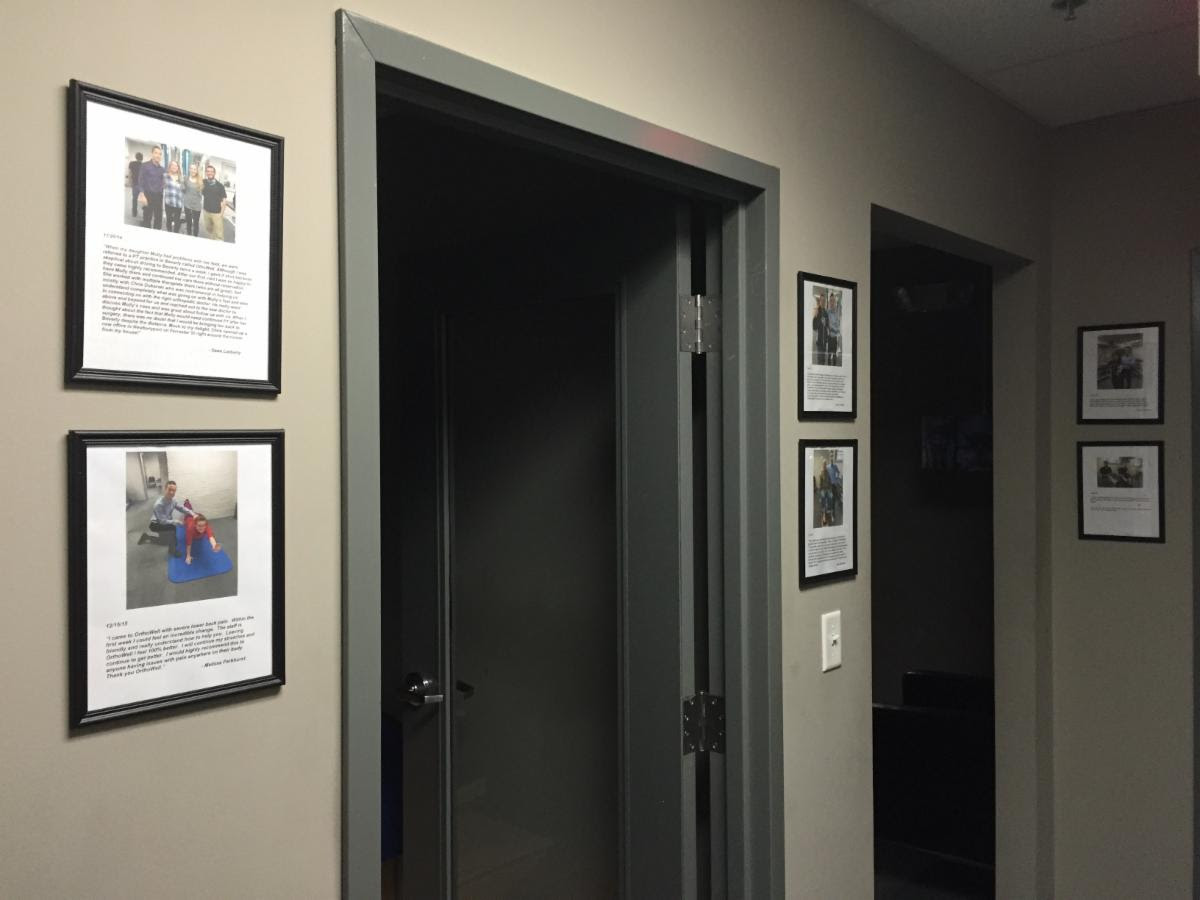
WALL OF FAME
We have started a Wall of Fame at each of our clinics. We are proud of our patients and the success that they have had. If you have previously provided us with a testimonial, we would love to take your picture with your therapist and hang it with your testimonial for display it in our clinic! Seeing is believing! Here is Beverly so far…..
2016 has arrived. Thank you once again for helping to make 2015 one of our best years ever at OrthoWell.
The start of a new year is a time for resolutions. You may want to consider resolving to NEVER have a recurrence of pain by joining our Wellness Membership program. Read more below to save dough!
I want to share with you what my staff and I have learned to improve your experience at OrthoWell and to remind you how awesome you CAN feel. Read on and let’s get you back on track.
MIRACLE CURE FOR TIGHT HAMSTRINGS?
What REALLY is the cause for your tights hamstrings?? That is the first question we ask when we evaluate you at OrthoWell. Once we discover the cause, the next question is how do we treat it?
There are many approaches from both an exercise and a manual therapy standpoint to release your hamstrings. We are currently getting certified in a new approach, a new paradigm to the treatment of musculoskeletal dysfunction called Total Motion Release.
TMR focuses on neurologic patterns and connections within your body. TMR focuses on movements of greatest ease to release restrictions in either the same or opposing body parts. For example, treatment for a left frozen shoulder could entail active range of motion exercises of your right shoulder and your left hip instead of direct mobilization of the right frozen shoulder. Seeing is believing.
The first video is a TMR shoulder “miracle” and the second is a TMR technique to stretch your hamstrings.
HAPPY HOLIDAYS PROMOTION!
WE DID IT – TOGETHER!!
Our holiday promotional was a success thanks to YOU! We donated $10 for each new patient that came through our doors from Thanksgiving thru the New Years Eve that was divided between two awesome organizations:
This option is for those of you who want the consistency of care on a monthly basis but do not want to spend all the money up front for a Preferred package. This program allows us to automatically debit your credit card on a monthly basis. It includes all of the features of the Preferred Program and is priced at $60 per session. You can schedule an ongoing appointment or call to schedule as needed. If you dont use it, you will NOT lose it. We will just keep track of what you have used or not used. However, the purpose of our maintenance is programs is to use them consistently in order to prevent any reccurence of pain. We would only need a 60 day advance notice to cancel the program.
UltraMan and Our Trainer Extraordinaire
Matt Veiga
I’ve been running since the 6th grade. I ran cross country and track through high school and college. After college I completely transitioned from running on roads to running on the trails. I ran my first trail marathon at Stone Cat trail marathon in 2011. The USATF New England Mountain Series is a series of races that focus on climbing and in some cases climbing and descending different mountains through MA, ME, and VT. Over the past 2 years, I have placed 3rd overall and have become a regular in the top five of all the races. The mountain series got me hooked on trail racing and the different approach it takes to do well. The trail and mountain races require you to be strong uphill in addition to having leg speed for the flats and downs.
In addition to running mountain races the past two year I have also run 2 ultra marathons which is any distance over the standard 26.2 mile marathon distance. Specifically I have run two 50k trail races or 31 miles. I have wanted to run an ultra since learning about 100 miles races in high school. For some sick reason it just seemed like a lot of fun to me. Like the mountain races, there are a whole different set of principals you need to learn as an ultra runner and it keeps you interested and working hard to reach your goals. Next year I hope to move up to the 50 mile distance while continuing to have success in the mountain series.
You can request private coaching services with Matt. He also has a blog at
Sometimes injuries happen and you need some help. Check out what a recent Beverly patient said about his care here at OrthoWell:
“After a bad fall in the shower I damaged my knee. The injury was painful when I walked upstairs or at a fast pace. After several months of slow recovery I started physical therapy at OrthoWell with Chris and his wonderful, talented staff. My progress was almost miraculous. For those who doubt there is anything that can be done for pain and limited mobility visit OrthoWell. You will learn a lot about your body to help stay mobile and healthy” Anthony Metaxas 11/13/15
Do you have low back pain? Check out the testimonial below and see how you can get 100% relief at OrthoWell:
“I came to OrthoWell with severe lower back pain. Within the first week I could feel an incredible change. The people are friendly and really understand how to help you. Leaving OrthoWell I feel 100% better. I will continue my stretches and continue to get better. I would highly recommend this to anyone having issues with pain anywhere on their body. Thank you OrthoWell.” -Melissa Parkhust 12/15/15
WALL OF FAME
We are starting a Wall of Fame at each of our clinics. We are proud of our patients and the success that they have had. If you have previously provided us with a testimonial, we would love to take your picture with your therapist and hang it with your testimonial for display it in our clinic! Seeing is believing!
Give us a call and we’ll schedule a time to take your photo so you can be one of the first patient success stories on our Wall of Fame!
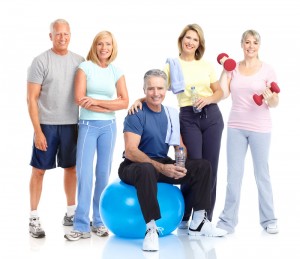
Our wellness goal at OrthoWell Physical Therapy is to partner with YOU in order to provide the BEST in physical therapy maintenance care to prevent return of pain or injury for a LIFETIME!
When you have experienced the OrthoWell approach to physical therapy care, you realize that we do things a little differently. We are not paint-by-the-numbers physical therapists. We are truly passionate about figuring out what is wrong with you. We are Holistic. We are Comprehensive.
On Day 1 you will see that we spend a lot of time evaluating your condition in order to provide you with an accurate functional diagnosis. If you aren’t assessing, you’re guessing! We don’t want to waste your time or your money.
Why don’t your entrust your care to the experts? Becoming a member of our Wellness Membership Program is the answer for long-term health and wellness.
Just think how you would feel if you received a monthly or even bi-monthly treatment that included a combination of Active Release Technique, Graston Technique, Cupping Therapy and Deep Tissue Laser Therapy to release stiff tissue that re-occurs as result of participating in sports, running, or even the daily stresses of being a stay-at-home Mom. Your treatment would be focused on problem areas that we identify with a re-evaluation. You wouldn’t just get “generalized” treatment that may or may not help solve the problem. You would then be instructed in appropriate exercises to perform during your session and to continue with as part of your maintenance or progressive program.
You can pre-purchase a package of wellness visits to become a member in our Preferred Program. This would qualify you for a FREE Deep Tissue Laser Therapy session with each visit. Consistent use of laser therapy helps to stimulate chemical reactions in your cells to accelerate healing and prevent future injury during your sport or daily activity. You will also receive future discounts and coupons for things such as custom foot orthotics, EFAC cream, physical therapy equipment, and referrals rewards to local health care practitioners such as personal trainers, massage therapists, chiropractors and acupuncturists who we trust and do business with.
The best part of this program is that you pay less when you make a commitment to your health.
Purchase a package of 6 wellness visits for $65 per visit or $390
Purchase a package of 12 wellness visits for $55 per visit or $660.
Why take a risk with your health?
In life there are no guarantees, but why take a chance on your health? Convince yourself that you are doing the most to OPTIMIZE your health. Partner with us to take control of your long-term health and wellness. What are you waiting for?
We would like to share the joy of the holidays by extending a special NEW YEARS offer to all of you! We value your support and trust in the services that we provide at OrthoWell PT and we want to show our appreciation. As a BIG THANK YOU, we are having a day of completely Free Exams and Deep Tissue Laser Therapy treatments in BEVERLY for:
· All past clients who have not been seen in PT in more than 3 months · All present clients who have another problem currently not being treated · All loved ones, family, friends, neighbors and co-workers of our past and present patients
If you are a past or present patient then call 978-522-4199 to schedule your Free Exam.
If you are referring a friend or family member, please forward this email to them or have have them call 978-522-4199 to schedule their Free Exam.
The day of Free Exams will be on:
TUESDAY, JANUARY 20th , 2015, from 1:00 to 6:00
The Free Exam consists of a 30 minute one-on-one appointment with one of our Physical Therapists. Our therapist will talk with you about the history of your problem and take measurements to test your motion and your strength.
After a thorough exam, they will discuss the CAUSE of your pain and provide you a PLAN for successful treatment.
They can also provide a complimentary Deep Tissue Laser Therapy treatment to your painful area. You can read much more about the benefits of therapeutic laser on our website by clicking HERE.
The appointments are free, but are limited as each PT only has 10 spots. Call 978-522-4199 now to schedule your Free Exam.
The Free Exam is ideal for people suffering with: · Lower Back Pain · Neck pain · Shoulder Pain · Foot Pain · Knee Pain · Hip Pain · Tendonitis · Arthritis · Sciatica · Headaches · Difficulty Walking
If you are having pain or problems with day to day activities such as walking, standing, sitting for long periods, going up or down steps, sleeping, driving or even pain that limits your ability to work or exercise, then this is an excellent opportunity to see one of our therapists and find out the cause of your problem.
DON’T MISS OUT!!
Call 978-522-4199 to schedule your Free Exam for January 20th, 2015!!
Sincerely,
Chris Dukarski,PT
PS – As a Special Bonus for the first 10 people that sign up for the Free Exam on January 20th, 2015, you will receive a Free Copy of my book on plantar fasciitis called the Plantar Fasciitis Treatment Guide.
My subject line is no joke. I really did find a cure for cancer!!
The realization will come as quite a shock to many of you.
I spend a lot of time reading and talking about health and fitness. I thoroughly research each and every blog post before I share it with you. Patient education is a top priority at OrthoWell and it is an integral part of our mission statement. We really DO care about you and your health. For this reason, I feel obligated to share the following information.
I was introduced to a book by one of my patients that may change or even SAVE your life! The title of the book is Outsmart Your Cancer by Tanya Harter Pierce. I have had the unfortunate experience of getting a phone call by my father that he has bladder cancer. The realization, of course, was more unfortunate for him. This came up in the conversation with my patient as we broached the cancer subject. She shared her experiences regarding her own cancer history and then she began to open my eyes, my mind, and my anger to the realization that our medical establishment is intentionally misinforming the public about cancer. Some of you may be saying “yeah, right, why wouldn’t my doctor tell me if there was a cure for cancer?” or, like my father said, “yes, I have heard these things before” but then he dispels the “myth” and decides to go through with his radiation and chemo. Don’t get caught up in the “disbelief factor”. I am telling you, from the bottom of my heart, not to be naïve and not to stay ignorant to this realization. You NEED to read this book as my words alone will not do it justice.
Outsmart Your Cancer is not a promotional vehicle for a new cancer pill or a new cancer prevention diet. As a matter of fact, the author does not promote any one single approach to curing cancer. Her objective is to share with us all that has been hidden from us. Yes, there are MANY alternative treatment options to both prevent and to cure yourself of cancer. Her introduction to cancer was the same as mine. The realization that a loved one may die from cancer! I would like to share some excerpts form the book regarding the misinformation campaign that has been waged on the public.
In the author’s words:
“I have also discovered that for many of these cancer approaches, the way they work has been proven by rigorous scientific research performed by highly respected physicians, brilliant biochemists, and Nobel prize-winning scientists. Effective alternative approaches to cancer ARE obtainable today, and they are not bogus methods developed by quacks and kooks as the public has been led to believe.’
“During my research, I spoke to over 100 people who had recovered from their cancers using the alternative treatments presented in this book.”
“The suppression (of information) has been carried out in many different ways by many different organizations and is simply the result of business economics and common unethical tactics that tend to occur when large money interests are involved in any field.’
‘Surgery, chemotherapy, and radiation involve billions of dollars of profits for the industries that supply them… the cost of developing and bringing a new cancer drug to market is close to $1 billion… A treatment made up of natural ingredients is not patentable… A natural form of treating cancer will never be pursued by a drug company… alternative treatments will always be considered an economic threat to the multibillion-dollar cancer establishment.”
If you want to watch a YouTube video to convince yourself of the misinformation campaign that has been waged by the FDA and American Medical Association, then watch this video on Dr Burzynski’s treatment for cancer. CLICK HERE.
So when should you start an alternative treatment approach if you’ve been diagnosed with cancer?
As soon as possible! Unfortunately, most people start with conventional treatment before they try alternative approaches. It is the fear and shock factor associated with “I have Cancer” that makes people decide prematurely regarding the BEST treatment option. They usually start with the big three…chemotherapy, radiation therapy, and surgery. Don’t become a statistic. Get educated!
So how do you make an educated decision on what treatment path to follow after you’ve been diagnosed with cancer?
Outsmart Your Cancer spells it out in simple terms and in black-and-white. There ARE options…successful options that have cured thousands of patients with cancer. All you need to do is read and/or listen (a DVD of patient testimonials comes with the book).
So when do you start a cancer prevention program?
NOW!!Outsmart Your Cancer will empower you to start a prevention program today. Scrutinize what you put into your body. Yes, you ARE what you eat. Don’t forget to read my post on Vitamins-To Take or Not To Take for more information.
Because I WANT to be your advocate for health and wellness and because I WANT you to stay cancer-free, I am stocking Outsmart Your Cancer in my clinic. I feel that strongly about the information in this book! I have purchased them in bulk so the wholesale cost is only $20 per book. Don’t delay! Get the facts!
Other things that could change your life that are discussed in the book include:
ACIDIC vs ALKALINE
Did you know that it has been scientifically proven that cancer cells cannot survive if the environment is alkaline enough? Did you know that the QUALITY of what you consume determines whether your body becomes acidic or alkaline? Many people, either with cancer or attempting to prevent cancer, strive to maintain their body pH at an optimal alkaline range between 7.0 and 7.5. Your body pH can be evaluated by a simple saliva test using pH strips in the privacy of your own home. So how do you do this? I’ll give you the answer even though you need to read more about it…CALCIUM. One of the most important roles of calcium is to help our bodies maintain proper pH levels. In addition, the absorption of calcium into the body is completely dependent on the levels of vitamin D in the intestinal tract.
WOMEN -THE PILL – HORMONE REPLACEMENT THERAPY
Do you really understand the effect of synthetic hormone replacement therapy? Outsmart Your Cancer discusses what every woman NEEDS to know about the effects of The Pill and hormone replacement therapy. You need to really be aware of the things that your doctor is NOT telling you. Long-term clinical studies have proven the cancer-causing effects of synthetic hormone replacement therapy. Get the facts!
MEN-TESTOSTERONE & PROSTATE CANCER
As for the men, did you realize how controversial conventional treatments are for prostate cancer? There are studies in the medical literature which contradict the current use of testosterone inhibiting drugs to lower your PSA level. It has been shown that testosterone actively INHIBITS cancer growth and that elevated PSA is actually a man’s defensive strategy for fighting prostate cancer. So then, why does the medical establishment advocate the exact opposite approach?
DENTAL FILLINGS & MERCURY
Did you know that the main component of silver fillings is mercury and that mercury is one of the most deadly substances on earth if ingested? Did you know that your dentist is not required to tell you that your filling contains mercury? Did you know that several European countries have band silver-mercury amalgam feelings for decades but they continue to be used in the United States? The toxic nature of amalgam feelings has been down-played by the American Dental Association for a century in spite of warnings to dentists to “never touch the amalgam with your fingers” and “it must be disposed of under strict toxic waste protocols.” Dentists who have been outspoken against amalgam fillings have lost their licenses to practice. Outsmart Your Cancer references a book written by one such dentist who describes the alleviation of multiple sclerosis and Parkinson symptoms as well as cancer via the removal of amalgam feelings. Once again, get the facts.
There is SO MUCH more in Outsmart Your Cancer. The rest is up to you!!
Do you take a multi-vitamin? Do you take vitamin C? If you said yes, you wouldn’t be alone. Supplement sales in 2012 hit $11.5 billion and are projected to be over $15 billion by 2017. People are looking for alternatives to traditional medicine and pharmaceuticals. If you have been in my physical therapy clinic, I am sure that many of you have heard me say “I am trying to place your body in the best position to heal”. The same can be said for my thoughts on vitamin and mineral supplements. Our bodies are incredible healing machines if you simply provide it the proper environment and the proper sustenance in which to heal. This blog post has been a labor of love as it has taken over 6 months to complete. I have attempted to provide THE EVIDENCE for why and what we should take for supplements. I hope this helps! Let me know what you think.
The first thing you need to realize is that there are a lot of unsubstantiated health claims made about vitamin and mineral supplements. You have to be a careful observer when reading about the “health effects” of supplements. Most of these substances are unregulated by the FDA. There has been an advocacy movement on the part of the USFDA to protect the consumer from unsubstantiated health claims. You can read more HERE. You need to be the educated consumer before making a purchase. Websites such as www.multivitaminguide.org provides a scientific comparison of over 100 brands of multi-vitamins. Check it out and see how YOUR choice compares.
I am of the opinion that you have to base your decision regarding supplements on the best available scientific information. This may mean that you put more trust in the biological “process” than in the actual “claim”. For example, we know that free radical damage is a “process” that can be mitigated by antioxidants. However, we cannot claim that antioxidants will “prevent cancer”. Read HERE to see four scientific examples or do a Medline search for the “effects of antioxidants” and take your pick.
I think that all of you would agree that stress is a threat to a person’s well-being. Your body responds to stress by utilizing an elaborate system of enzymes, vitamins, minerals and antioxidants to defend itself. Read HERE for details. An antioxidant is a compound that neutralizes the effects of free radicals. Free radicals are highly unstable molecules that attack the nearest stable molecule and strip it of an electron. This can cause a chain reaction called oxidative stress which can cause damage to a living cell. Free radicals are a natural byproduct of cellular metabolism but their numbers may exceed the number ofantioxidants when experiencing high levels of emotional OR physical stress. If this cycle goes unabated, it may lead to inflammation, infection, heart disease, or cancer to name a few. Obviously, this is a process that we want to mitigate. As a result of the depletion of antioxidants when under stress, it is recommended that you supplement or ingest fruit & vegetables not just once, but several times during the day. Yes, there are many different types of antioxidants. Vitamin E & C are probably the most popular. What do you choose as part of a dietary supplement regimen? It depends on who or what you read and how much money you want to spend. Is one any better than the other? Same answer! One way to look at it is “the more you stress, the more you need”.
The recommended daily allowance of fruits and vegetables to maximize your levels of dietary antioxidants is 5-10 servings. Rich Vitamin E sources are things such as whole grain, nuts (especially almonds!), and seeds. Read more HERE. Unfortunately, most people don’t come close to these daily allowances. One way to help neutralize the effects of free radicals is to supplement your diet with antioxidants. Vitamin E is a fat-soluble antioxidant that is very efficient at breaking the oxidative stress chain. Vitamin C is a very abundant water-soluble antioxidant. It actually plays a role in returning Vitamin E to its active form. All citrus fruits contain high levels of Vitamin C. Polyphenols are another option. They are the chemicals that give fruit and vegetables their color. They are powerful antioxidants as well. Here is one example of polyphenols and one that I take on a daily basis. Check it out HERE.
So what’s up with the fatty acids? I’m sure that you have heard of omega-3’s and omega- 6’s. Right? This is the reason some people take “fish oil”. Some of you may even remember choking down cod liver oil as a child. With the advent of preservatives and the addition of poor quality vegetable oils in our foods, our ratio of omega-6 to omega-3 has gone awry. The ratio of omega-6 to omega-3 in the typical Western diet can be up to 16:1. Not good! Human beings evolved with the ratio being around 1:1. Excessive amounts of omega-6 polyunsaturated fatty acids and a very high omega-6/omega-3 ratio can promote diseases such as cancer, cardiovascular disease and inflammatory and autoimmune diseases, whereas increased levels of omega-3 (a low omega-6/omega-3 ratio) can have a preventative effect. Omega-3 can also help regulate pain and inflammation as well as maintain proper blood pressure and cholesterol levels. Read HERE for more.
So how do you decide which omega product to purchase? You want to purchase a product that has the highest purity and potency. Purity means that it is free of toxic chemicals such as mercury and PCB’s. Potency is based on the actual amount of EPA and DHA in the oil. EPA and DHA are the essential fatty acids in omega-3. Essential fatty acids cannot be produced by the body and are “essential” to ingest. Food sources high in omega-3 are salmon, almonds, flax, walnuts just to name a few. Check on-line for a chart. You want to ensure that the product that you intend on purchasing has undergone third party testing. The International Fish Oil Standards Program at http://www.ifosprogram.com/ is one such organization. Here is an example of the IFOS page for the omega 3 product that I use. Click HERE. So how much omega-3 do you need? I have concluded based upon my research that the daily recommended allowance for omega-3’s is anywhere between 2500-10,000 mg.
Have you ever had your Vitamin D level checked? If not, you may want to. A study published in the Archive of Internal Medicine in 2009 showed that Vitamin D levels have “plummeted” among ALL U.S. ages, races, and ethnic groups over the past two decades. This is especially true in seasonal parts of the country like New England where sun exposure is variable. Because there are such small amounts of Vitamin D in food, the only 2 ways to get adequate amounts is thru direct sun exposure or via supplements. The best form to take is Vitamin D3 and it is this form that is produced during sun exposure. Over the past 10 years, several researchers have found an association between extremely low vitamin D levels and chronic, general pain that doesn’t respond to treatment. Read HERE. Go the preceding link to read several examples of people who had miraculous results in pain reduction with Vitamin D supplementation. So how much should you take? The Vitamin D council recommends anywhere between 5000-10,000 IU per day. Check out their recommendations HERE. Here is a LINK comparing options for purchasing vitamin D. I take the generic Vit D3 from CVS.
So how about the MANY other vitamins and minerals? The Vitamin D Council gives recommendations for vitamins that work synergistically with Vitamin D. They include Vitamin A, Vitamin K, Zinc, Boron and Magnesium. You can read more about them and the recommended daily allowances HERE. As mentioned earlier, websites such as www.multivitaminguide.org provides a scientific comparison of over 100 brands of multi-vitamins which should contain all the recommended daily allowances of trace minerals and vitamins. My choice is first on the list from XtendLife: Total Balance.If you need to supplement your B vitamins, another option in liquid form is called Folidreen. Taking your supplements in liquid form and adding them to juice is a great option for those who have difficulty taking pills.
I have also been questioned about and have had personal experience with urine turning a bright yellow when taking a multivitamin. Is this bad? One of the main reasons for this is the excretion of riboflavin. The Latin origin of riboflavin is from the word flavus which means “yellow” or “blonde”. Your yellow urine reveals one key thing. Your body has taken what it can from the vitamins and the rest is excreted. Read more HERE.
So why do we need trace minerals? Minerals are essentially the elements on the periodic table in chemistry class. They are things like chromium, zinc, magnesium, calcium, iron etc. They work synergistically with all of the other vitamins and nutrients that our bodies need to maintain optimal health. Ideally, trace minerals should come from eating a raw food diet. Unfortunately, researchers have shown that raw food isn’t even enough because our soils have been so depleted of these vital minerals. It is believed that 90% of people are deficient in trace minerals. READ HERE. If it’s not in the soil and it’s not in our food, then what do you do? You need to get your trace minerals via a supplement. You need to scrutinize your multi-vitamin and even look into liquid options such as Concentrace: Trace Mineral Drops.
Another example of the importance of minerals is the balance of calcium and magnesium in our systems. As stated at Natural Vitality:
“Magnesium and calcium are fundamental nutrients that need to be in balance with each other in order for you to fully experience good health. Their importance on a cellular level is critical. Calcium and magnesium are like opposite sides of a coin. Calcium excites nerves, while magnesium calms them down. Calcium makes muscles contract. Magnesium is necessary for muscles to relax. Calcium is needed for blood clotting, but magnesium keeps the blood flowing freely.”
Deficiency of magnesium or calcium can be caused by a number of stresses on the body including emotional stress, taking drugs such as diuretics, antibiotics, oral contraceptives, insulin, or cortisone, heavy exercise, diabetes, and gastrointestinal disorders. Some people may need to seriously consider supplementation when these conditions exist. Calcium is extremely important as an alkalizing agent for your body. Stress and poor nutrition makes your body acidic. Acidic environments promote cancer growth! The recommended daily intake of calcium according to the National Institute of Health is 1000mg for adults aged 19-50 and 1200 for 51 plus. The recommended daily intake for magnesium according to the NIH is 320g for age 30 and older. Don’t forget that calcium CANNOT be ingested without Vitamin D. So you may want to order the combination of the two in a product. An excellent source of calcium is coral calcium. You can read HERE for a comparison of the best coral calcium products on the market. I order mine in tablet and powder form (for my smoothies) from True Blue.
So how about your joints? What are the best supplements? You want to focus on products that deliver RESULTS! The best known supplements for joint health are glucosamine and chondroitin. But have they been shown to be effective? The Cochrane Database www.cochrane.orgof Systemic Review is the largest collection of randomized controlled studies in the world. The Cochrane Review of glucosamine for arthritis looked at 4963 patients and concluded that glucosamine “failed to show benefit in pain and function”.
Products which contain esterified fatty acids are turning out to be the new gold standard in the treatment of joint pain. One example is EFAC or esterified fatty acids complex. It is comprised of a proprietary blend of esterified fatty acids that inhibit the inflammatory cascade by bonding to white blood cells and inhibiting a mediator of inflammation called prostaglandin. Double-blind studies using EFAC for osteoarthritis and periodontal (gum) disease have been published in leading medical journals including the Journal of Rheumatology and the Journal of Periodontology.It has been shown that EFAC can reduce joint and muscular discomfort within 30 minutes of topical application and within 14 days of oral consumption. You can read more HERE.
It is available in both capsules and creams in order to maximize your results. Both are available and for sale in our clinic. You can find more information at www.hopescience.com.
In conclusion, yes, I am a believer in taking supplements. I hope that this blog post has made you a believer as well. Please let me know your thoughts or your experiences with supplements. We can all learn from one another!
What do you think of when you visualize someone who is really stressed out? It sure seems like some people are wound tightly these days. I have had my own issues with stress. I’m sure you have too. I find myself talking more and more with my patients about the effects of stress and how beneficial diaphragmatic breathing and proper nutrition can be. We will discuss nutrition in an upcoming post. You also need to be aware of other possible manifestations of stress like increased muscle tone, rapid heart rate, palpitations, increased blood pressure, GI distress, mood swings, loss of appetite, and sleep disturbances to name just a few. These symptoms make living a happy, relaxed and “normal” life much more difficult.
So what about the relationship between stress and breathing? Breathing occurs at a very primal level. If you don’t breathe, you don’t live! Your body will do whatever it takes to draw air into the lungs. Instead of using the diaphragm, it may recruit other accessory muscles in your neck or low back. This pattern reinforces poor posture and causes impaired flexibility which can promote shallow, ineffective breathing. It prevents the ability to exhale fully and to perform a proper, full diaphragmatic breath. Lets review what that means.
First of all, when performing a diaphragmatic breath, your belly should expand outward. This is due to the downward movement of your diaphragm as you inhale. Secondly, your lower ribcage should expand. Thirdly, your upper ribcage will expand during a maximal inhalation. Your ribcage should expand as a unit. It should NOT elevate. Movement of your ribcage upward, shoulder shrugging, or contraction of your neck muscles are all signs of faulty breathing patterns. Remember that slouched sitting and forward head posture encourages shallow breathing and prevents full, complete expansion of your ribcage. We discussed breathing pattern disorders in relation to CORE activation during my last post and video demonstration. Here it is in case you missed it:
So what does the research say about the link between pain and breathing disorders? A very interesting phenomenon is the prevalence of pain syndromes that are NOT caused by a specific organic illness. Katon & Walker (1998) noted that patients with the most common physical symptoms (i.e. abdominal pain, chest pain, headache, back pain), are responsible for half of all primary care visits in the USA, and yet only 10%–15% of these are found to be caused by organic illness! All these symptoms are well recognized as capable of being the result of breathing pattern disorders.
Perri and Holford (2004) evaluated 111 patients attending a chiropractic pain clinic and found 56.4% demonstrated faulty breathing on relaxed inhalation, increasing to 75% when taking a deep breath. 87% reported a history of various musculoskeletal pain problems. Based on this population, they observe that: “Chances are 3 in 4 that new patients seen today will have faulty breathing patterns.”
So what does the research say about the effects of breathing exercises on stress? Remember, stress reactions are controlled by our autonomic nervous system i.e. sympathetic and parasympathetic. Fight or flight? In Pal and colleagues, breathing exercises were shown to enhance the parasympathetic (inhibitory or calming) effects and decrease the sympathetic (excitatory) effects of muscles and nerves. They improve respiratory and cardiovascular function and improve both physical and mental health. Convinced yet?
So how do you begin breathing exercises?The first step is understanding that the relaxation response has to be relearned. You need to learn how to identify and turn off the stress response. As stated by Kabat-Zinn, “you need to learn how to replace negative thoughts and physical tension with regular practice of ‘calm stillness of mind and body’ “. Buddha is in the house! The next step is to schedule regular daily practice. You need to invest 10-15 minutes at least one time every day. According to Leon Chaitow, we need to “restore an energy-efficient, low chest, nose-breathing pattern with a relaxed pause at the end of exhalation”. He calls it “low slow nose breathing”. Initially, lay comfortably supported by pillows in a quiet room. Progress to sitting once a positive outcome is achieved in lying. You need to reinforce proper posture at home, work, and car and realize that breathing and relaxation techniques only help eliminate the symptoms, not the causes of stress. Be honest about making realistic lifestyle changes. The video below demonstrates a method that uses both breathing and physical relaxation techniques.
Remember that breathing drives everything that happens, both good and bad, throughout our entire bodies. So breathe right to live right!!
The sacroiliac or SI joint is the articulation between the bone at the base of the spine called the sacrum and the bones on both sides of the pelvis called the ilium. Refer to the picture below.
Over 22 years of physical therapy, I have treated many patients with low back and buttock pain who were diagnosed with an SI joint dysfunction. The difficulty with diagnosing an SI joint dysfunction is that the SI joint has no specific distribution pattern of pain. Pain directly over the SI joint does not necessarily mean that the joint itself is involved. SI joint pain can very often be referred pain from other structures such as the disc, nerve root, or facet joints of the lumbar spine. Many physical therapists or physicians attempt to diagnose an SI joint dysfunction through palpation of bony landmarks as well as assessment of SI joint mobility. There is only a very small amount of motion in the SI joint i.e. 2-3 mm or 2-3° of gliding or rotation thereby making an accurate diagnosis very difficult. In addition, evidence based research refutes the reliability and validity of accurately assessing bony landmarks and SI joint mobility. McGrath et al has published an article, entitled “Palpation of the sacroiliac joint: an anatomical and sensory challenge” in which the concept of SI joint palpation is scrutinized. Freburger and Riddleperformed a literature review looking at our ability to perform SI joint motion testing. They found poor inter-tester reliability, low sensitivity, and low specificity in several commonly performed tests. Inter-rater reliability is essentially the ability for multiple practitioners to come to the same diagnostic conclusion. If you have multiple individuals perform the same test, the results should be the same. Riddle and Freburger in another study noted that the ability to detect positional faults of the SI joint also has poor reliability. At present, the only acceptable method of confirming or excluding a diagnosis of a symptomatic SI joint is a fluoroscope guided intra-articular anesthetic block ie an injection directly into the SI joint. (Laslett et al) So how can I, as your physical therapist, assist in the diagnosis of an SI joint dysfunction? The answer: SI joint provocation tests!
Two recent studies by Laslett et aland Van der Wurff et al have demonstrated that there isn’t just one key or ideal SI joint provocation test. However, by performing several tests together, you can increase your sensitivity and specificity of detecting an SI joint dysfunction. Both studies reported that the accuracy of detecting SI joint dysfunction is increased if least 3 of the 5 tests are positive. Furthermore, if all 5 tests are negative, you can likely look at structures other that the SI joint. Van der Wurff et al reported that if at least 3/5 of these tests were positive, there was 85% sensitivity and 79% specificity for detecting the SI joint as the source of pain. Interestingly, another study by Kokmeyer et alagreed with the previous findings, but also noted that the thigh trust test alone was almost as good at detecting SI joint dysfunction as the entire series performed together.
Combining the two studies, there are 5 provocation tests to perform when attempting to diagnose SI joint pain:
Thigh thrust/Femoral Shear test
SI Distraction Test
SI Compression Test
Gaenslen’s Test
FABER / Patrick’s test
The following video will demonstrate these tests. I would like to thank Mike Reinold, PT for his blog information that was used to complete this explanation of SI Joint dysfunction. Check out the video below!!
CORRECTION: I would like to clarify the SI distraction test as described in Laslett. I believe that he considers the direct posterior shear of the innominates as a distractive force of the ilium away from the sacrum. I initially interpreted this test as a compression of the SI joint via a distraction of the ASIS’s. I guess it depends on HOW you apply the force to the ASIS’s. Also, the sidelying “compression” test needs to be performed in a straight, linear fashion as well in order to compress the SI joint. It is important to place a towel roll under the lumbar spine in women in order to prevent sidebending stress t the lumbar spine. In OMT, we use the sidelying position to “distract” the SI joint using more of a rotational force on the lateral edge of the ilium in order to “open up” and distract the SI to get a feel for joint play. As you can see, these tests are not definitive for exactly HOW they stress the joint but they are specific for a stressing maneuver TO the SI joint.
WOW!! We have been really busy here at OrthoWell. Thanks to you-our awesome patients!! I have been a little sidetracked from my blog posts recently as I am SURE all of you have noticed and have “sorely” missed. With the help of my incredible crew we attended (with our treatment tables and elbow grease) one 5K, one half marathon, and one health care exhibition during the month of May. In the meantime, I have been very focused on bringing new life and a new face to my website. How do you like the snazzy, new look of this newsletter? You can see on our homepage how easy we made it to quickly view our clinic’s specialties and the things that set us apart from other physical therapy clinics. You can see how much more personalized and descriptive we made the website by adding our OWN pictures. We all felt like movie stars during the photoshoot. I have never before seen Geoff smile so much!?! The OrthoWell miracles continue!! With this post, I would love to introduce, with eager anticipation, my NEW LOOK at www.orthowellpt.com Please take the time to LIKE US if you like what you see. I also included a few pictures: Megh’s first and victorious half marathon run and Geoff and I healing the wounded at the Gloucester Twin Lights Half Marathon.


